Never miss a Claude Code prompt
Tap a Claude Code notification → instant resume over rock-solid Mosh. MT is the mobile companion for Claude Code, Codex, and AI coding agents — push notifications at the system level via hook integration, and the notification tap auto-resumes the exact tmux session (host, user, and session name matched automatically). Not just SSH — a pro terminal for mobile developers.
This step requires MT installed and a server already set up with SSH + tmux. If you haven't set up the server yet, skim Steps 2 – 7 first and come back here — the notification hooks are the payoff of the full MT + Claude Code flow.
Step 1: Enable in MT
Open MT → Settings → Push Notifications → turn on the toggle. Copy the Device Secret shown on screen.
Step 2: Run Setup Command
Run this command in your terminal. It installs a notification script and adds hooks to your ~/.claude/settings.json automatically. Works on macOS, Linux, and Windows (WSL):
curl -sL https://raw.githubusercontent.com/Jaga-Studio/mt-push-hooks/main/setup-hooks.sh | sh -s YOUR-DEVICE-SECRET
Replace YOUR-DEVICE-SECRET with the value from Step 1. Then restart Claude Code.
The script installs ~/.claude/hooks/mt-push-notify.sh and adds two hooks to your settings. It safely merges with existing settings (backup created). Re-run to upgrade from older versions.
📂 Requires: Node.js (always available with Claude Code)
What You'll Receive
Notifications include the actual content of what Claude was doing:
// Task completion — Claude's last response (first 200 chars)
"Edited 3 files and verified the build passes. All tests green."

// Permission request — the actual prompt
"Claude needs your permission to run: git push origin main"
Manual Setup (Alternative)
If you prefer to configure manually, download mt-push-notify.sh to ~/.claude/hooks/, replace __MT_DEVICE_SECRET__ with your secret, then merge hooks-template.json into your settings.json. See GitHub for details.
Tip: You can run the setup command directly from MT. Copy the Device Secret in MT Settings, switch to your SSH session, and paste the command — all without leaving the app. Or use the Auto Setup button in Push Notification settings.
You can regenerate your Device Secret at any time from MT → Settings → Push Notifications → Security. This invalidates the old secret immediately.
What You Need
A Computer to Connect To
Your Mac, Windows PC, or Linux machine at home or work
PC (for initial setup)
macOS or Windows — to set up secure login
iPhone with MT
Download from the App Store
Enable SSH on Your Computer
SSH lets you remotely control a computer from your iPhone. Enable it on the computer you want to connect to.
# Method 1: System Settings (recommended)
# System Settings > General > Sharing > Remote Login → ON

# Method 2: Command line
sudo systemsetup -setremotelogin on

# Verify SSH is running
sudo launchctl list | grep ssh
If using macOS Firewall, allow "Remote Login" in System Settings > Network > Firewall.
Step 1: Install OpenSSH Server
# PowerShell (Run as Administrator)

# Install OpenSSH Server
Add-WindowsCapability -Online -Name OpenSSH.Server~~~~0.0.1.0

# Start the SSH service
Start-Service sshd

# Enable SSH to start automatically on boot
Set-Service -Name sshd -StartupType 'Automatic'
Step 2: Allow SSH in Windows Defender Firewall
# PowerShell (Run as Administrator)

# Check for existing SSH rules
Get-NetFirewallRule -Name *ssh* -ErrorAction SilentlyContinue

# If no rule exists, create one
New-NetFirewallRule -Name sshd -DisplayName 'OpenSSH Server (sshd)' `
  -Enabled True -Direction Inbound -Protocol TCP `
  -Action Allow -LocalPort 22
Step 3: Test the connection
# Test on the same PC
ssh localhost

# Or from another PC
ssh username@192.168.x.x
Mosh and tmux do not work natively on Windows. SSH connections only. For Mosh/tmux, see the WSL section (Step 6).
# Ubuntu/Debian — usually pre-installed
sudo systemctl enable ssh
sudo systemctl start ssh

# CentOS/RHEL
sudo systemctl enable sshd
sudo systemctl start sshd
Tailscale for Easy Access
Normally, connecting from outside your home network requires complex router settings. Tailscale skips all of that — just install it on both devices, sign in with the same account, and they can talk to each other from anywhere.
No router port forwarding
Access from anywhere
Mosh UDP tunneling built-in
# Method 1: Mac App Store — search "Tailscale" (recommended)

# Method 2: Homebrew
brew install --cask tailscale
After installation, click the Tailscale icon in the menu bar and sign in.
# 1. Download from tailscale.com/download
# 2. Run the installer
# 3. Sign in via the taskbar icon
curl -fsSL https://tailscale.com/install.sh | sh
sudo tailscale up
Install "Tailscale" from the App Store and sign in with the same account.
# Check your Tailscale IP on the server
tailscale status

# Example output:
# 100.64.0.2   my-server   linux   -
# → Use 100.64.0.2 as hostname in MT
With Tailscale, firewall settings from Step 3 are not needed within the Tailscale network. However, keep them if you also connect on local networks.
Set Up Secure Login
SSH keys are like a digital key pair — a private key on your iPhone (kept secret) and a public key on your computer (like a lock). This lets you log in without typing a password every time.
Step 1: Generate SSH Keys
# Generate SSH key (you'll be prompted for a passphrase)
ssh-keygen -t ed25519 -C "your-email@example.com"

# Copy public key to clipboard
cat ~/.ssh/id_ed25519.pub | pbcopy
# Check OpenSSH client (usually pre-installed)
ssh -V

# Generate SSH key
ssh-keygen -t ed25519 -C "your-email@example.com"

# Display public key to copy
Get-Content $env:USERPROFILE\.ssh\id_ed25519.pub
Step 2: Register Public Key on Your Server
# Connect via SSH (password auth) and add public key
ssh user@your-server "mkdir -p ~/.ssh && chmod 700 ~/.ssh"

# Append your public key
ssh user@your-server "echo 'PASTE_YOUR_PUBLIC_KEY_HERE' >> ~/.ssh/authorized_keys && chmod 600 ~/.ssh/authorized_keys"
# On the Windows server — PowerShell (Run as Administrator)

# For standard users:
New-Item -Force -ItemType Directory -Path $env:USERPROFILE\.ssh
Add-Content -Path $env:USERPROFILE\.ssh\authorized_keys -Value "PASTE_YOUR_PUBLIC_KEY_HERE"

# For admin users:
Add-Content -Path $env:ProgramData\ssh\administrators_authorized_keys -Value "PASTE_YOUR_PUBLIC_KEY_HERE"
icacls $env:ProgramData\ssh\administrators_authorized_keys /inheritance:r /grant "Administrators:F" /grant "SYSTEM:F"
Step 3: Test Connection
# Verify passwordless login
ssh user@your-server
When using Tailscale, replace "your-server" with the Tailscale IP (100.x.x.x).
Install Mosh & tmux
Mosh keeps your connection alive even when your iPhone switches between Wi-Fi and cellular. tmux lets you split your screen and keep work running even after you disconnect. Install both on the computer you connect to.
# Install Homebrew if not already installed
/bin/bash -c "$(curl -fsSL https://raw.githubusercontent.com/Homebrew/install/HEAD/install.sh)"

# Install Mosh and tmux
brew install mosh tmux

# Verify
mosh --version
tmux -V
Mosh and tmux do not run on native Windows OpenSSH Server. If you only need SSH, skip this step and proceed to Step 7.
Tip: Start with SSH-only. Add WSL later if you need Mosh/tmux.
Step 1: Install WSL
# PowerShell (Run as Administrator)
wsl --install
# Restart, then set up Ubuntu username and password
Step 2: Set up SSH + Mosh + tmux in WSL
# Inside WSL Ubuntu terminal
sudo apt update
sudo apt install openssh-server mosh tmux

# Start SSH server
sudo service ssh start

# Verify
mosh --version
tmux -V
Step 3: Connect to WSL
# With Tailscale: install Tailscale inside WSL
curl -fsSL https://tailscale.com/install.sh | sh
sudo tailscale up
# Ubuntu/Debian sudo apt update sudo apt install mosh tmux # CentOS/RHEL sudo yum install epel-release sudo yum install mosh tmux # Verify mosh --version tmux -V
Recommended tmux Settings
Add the following to ~/.tmux.conf on your server for the best experience with MT.
# Enable mouse/touch scroll support
set -g mouse on

# Enable clipboard sharing (copy from terminal → iPhone)
set -s set-clipboard on
set -as terminal-features ',xterm-256color:clipboard'

# Allow escape sequence passthrough (e.g. image display, notifications)
# Requires tmux 3.3a+ — "half" restricts to active pane only (safer)
set -g allow-passthrough half

# Enable synchronized output (smooth screen redraws)
# Requires tmux 3.3a+ — check with: tmux -V
set -as terminal-features ',xterm-256color:sync'

# Clipboard fix for Mosh connections
set -as terminal-overrides ',xterm-256color:Ms=\E]52;c;%p2%s\007'

# Increase scrollback buffer (default: 2000)
set -g history-limit 100000
After saving, reload the config:
tmux source-file ~/.tmux.conf
The sync setting prevents visible screen flickering during large output (e.g., builds, logs). It requires tmux 3.3a or later. The Ms override is required for clipboard sharing through Mosh connections. Existing tmux sessions need to be detached and reattached for changes to take effect.
Add a Connection
Open MT on your iPhone. You'll see the session list — tap the "+" button in the top right to add a new connection.
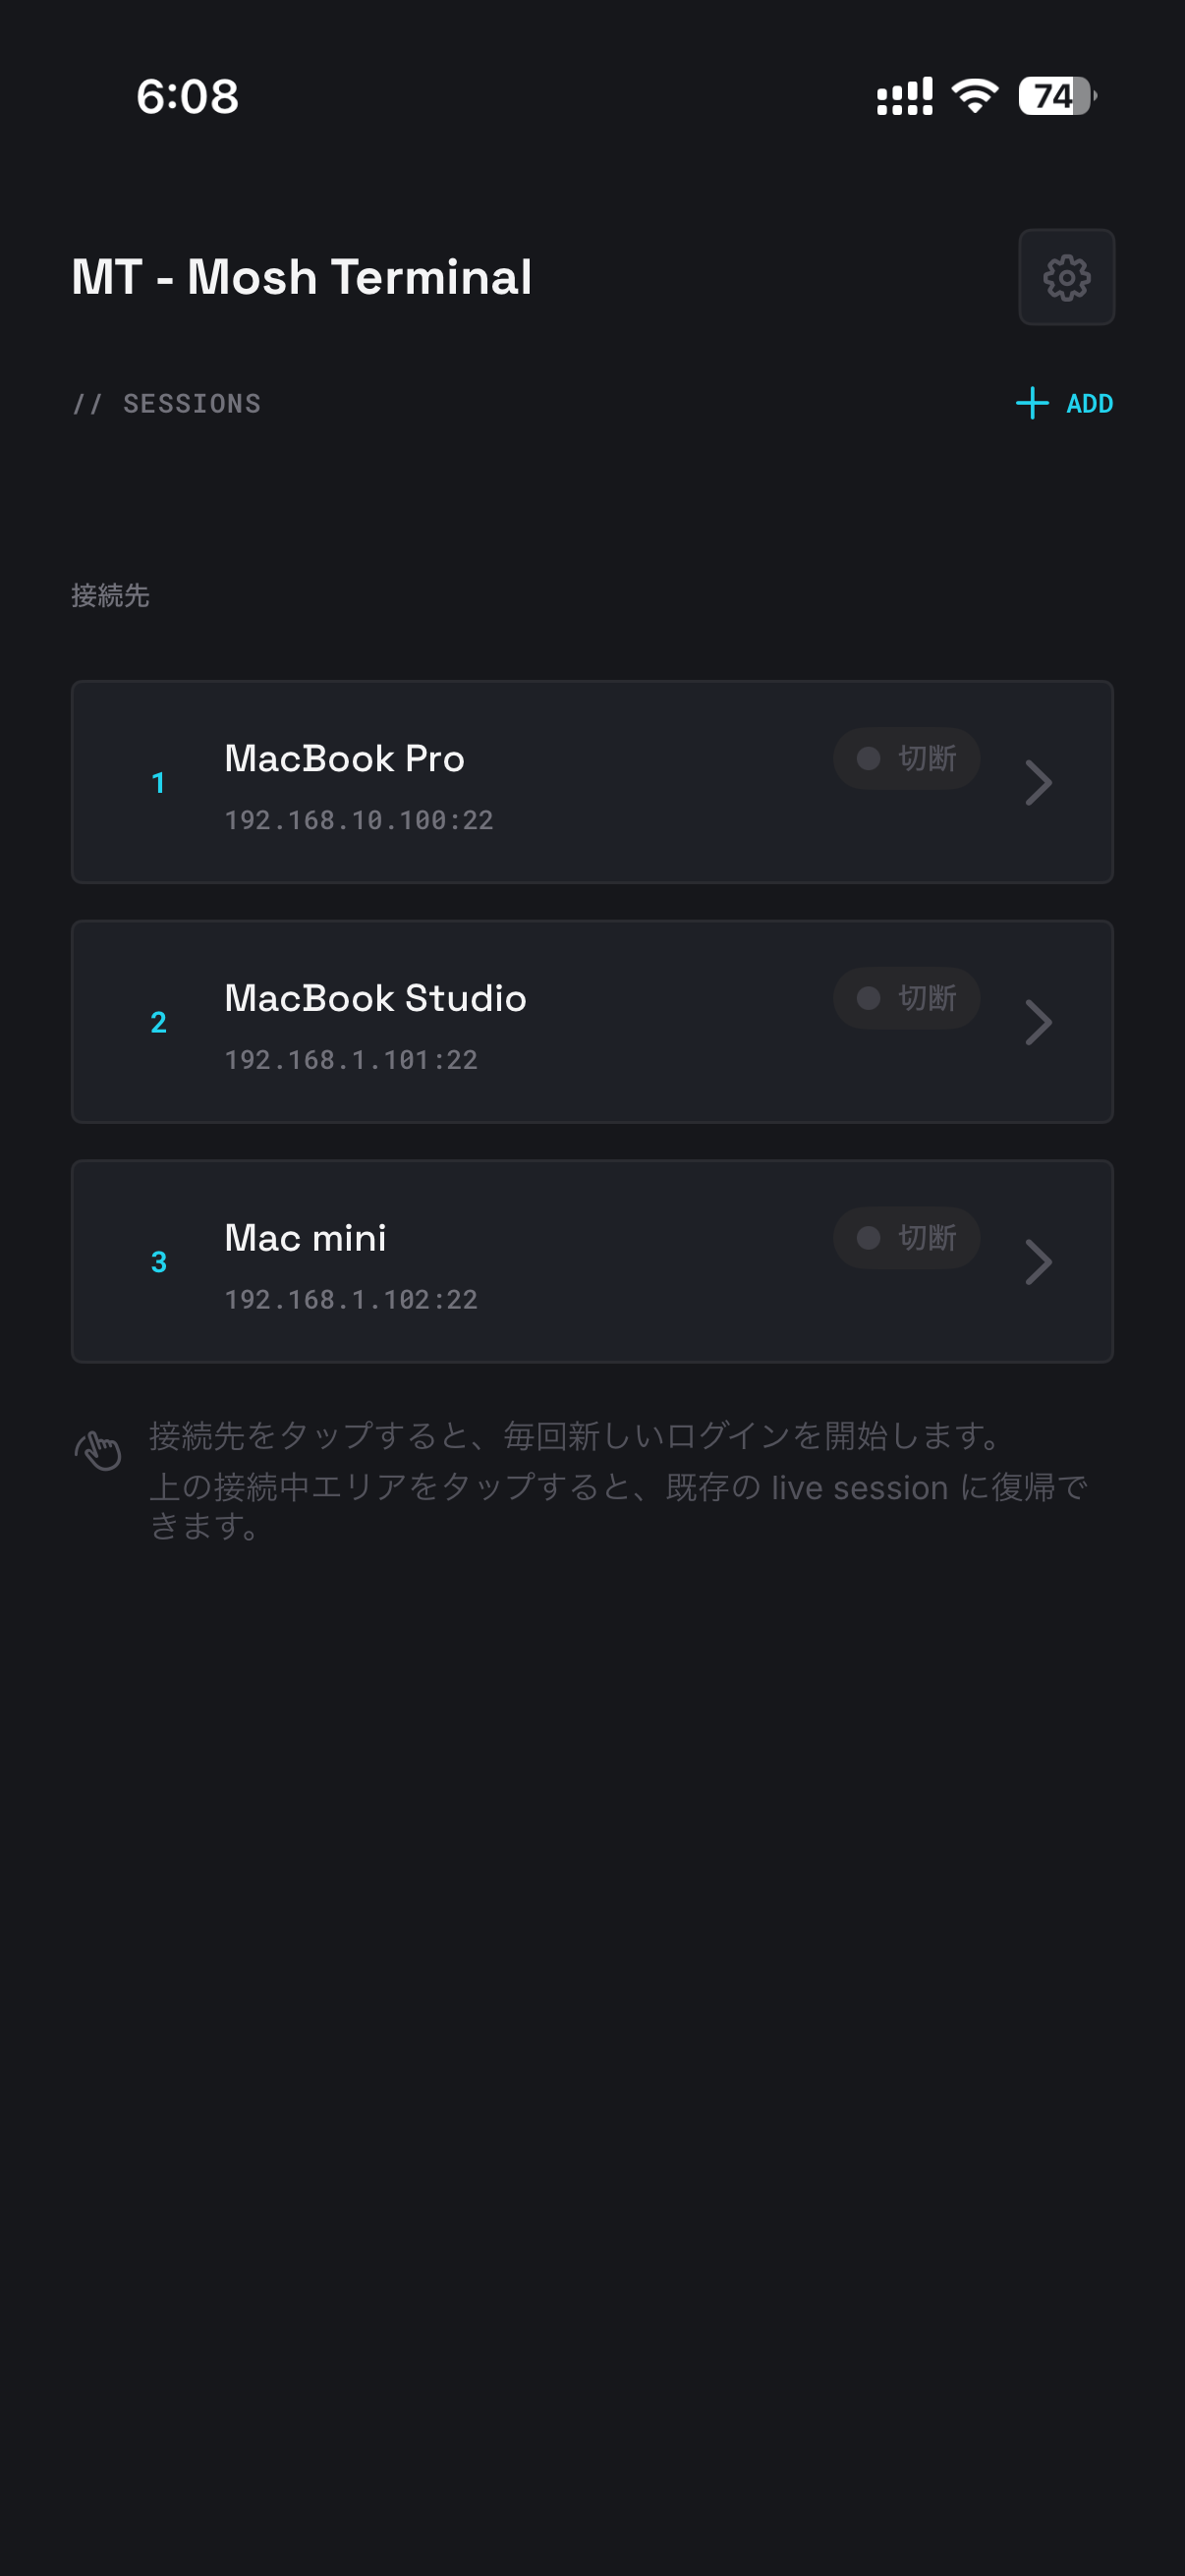
- Hostname: Enter your computer's IP address (e.g. 192.168.1.10) or Tailscale IP (e.g. 100.64.0.2)
- Port: Leave as 22 (the default)
- Username: The login name on your computer (e.g. "john" or "admin")
- Authentication: Choose SSH key (recommended) or password. You can import the key from Step 5, or generate a new one in the app
Connect
Tap your saved connection to connect. If this is your first time, you may see a host key confirmation — tap "Trust" to continue. Once connected, you'll see a terminal just like on your PC.
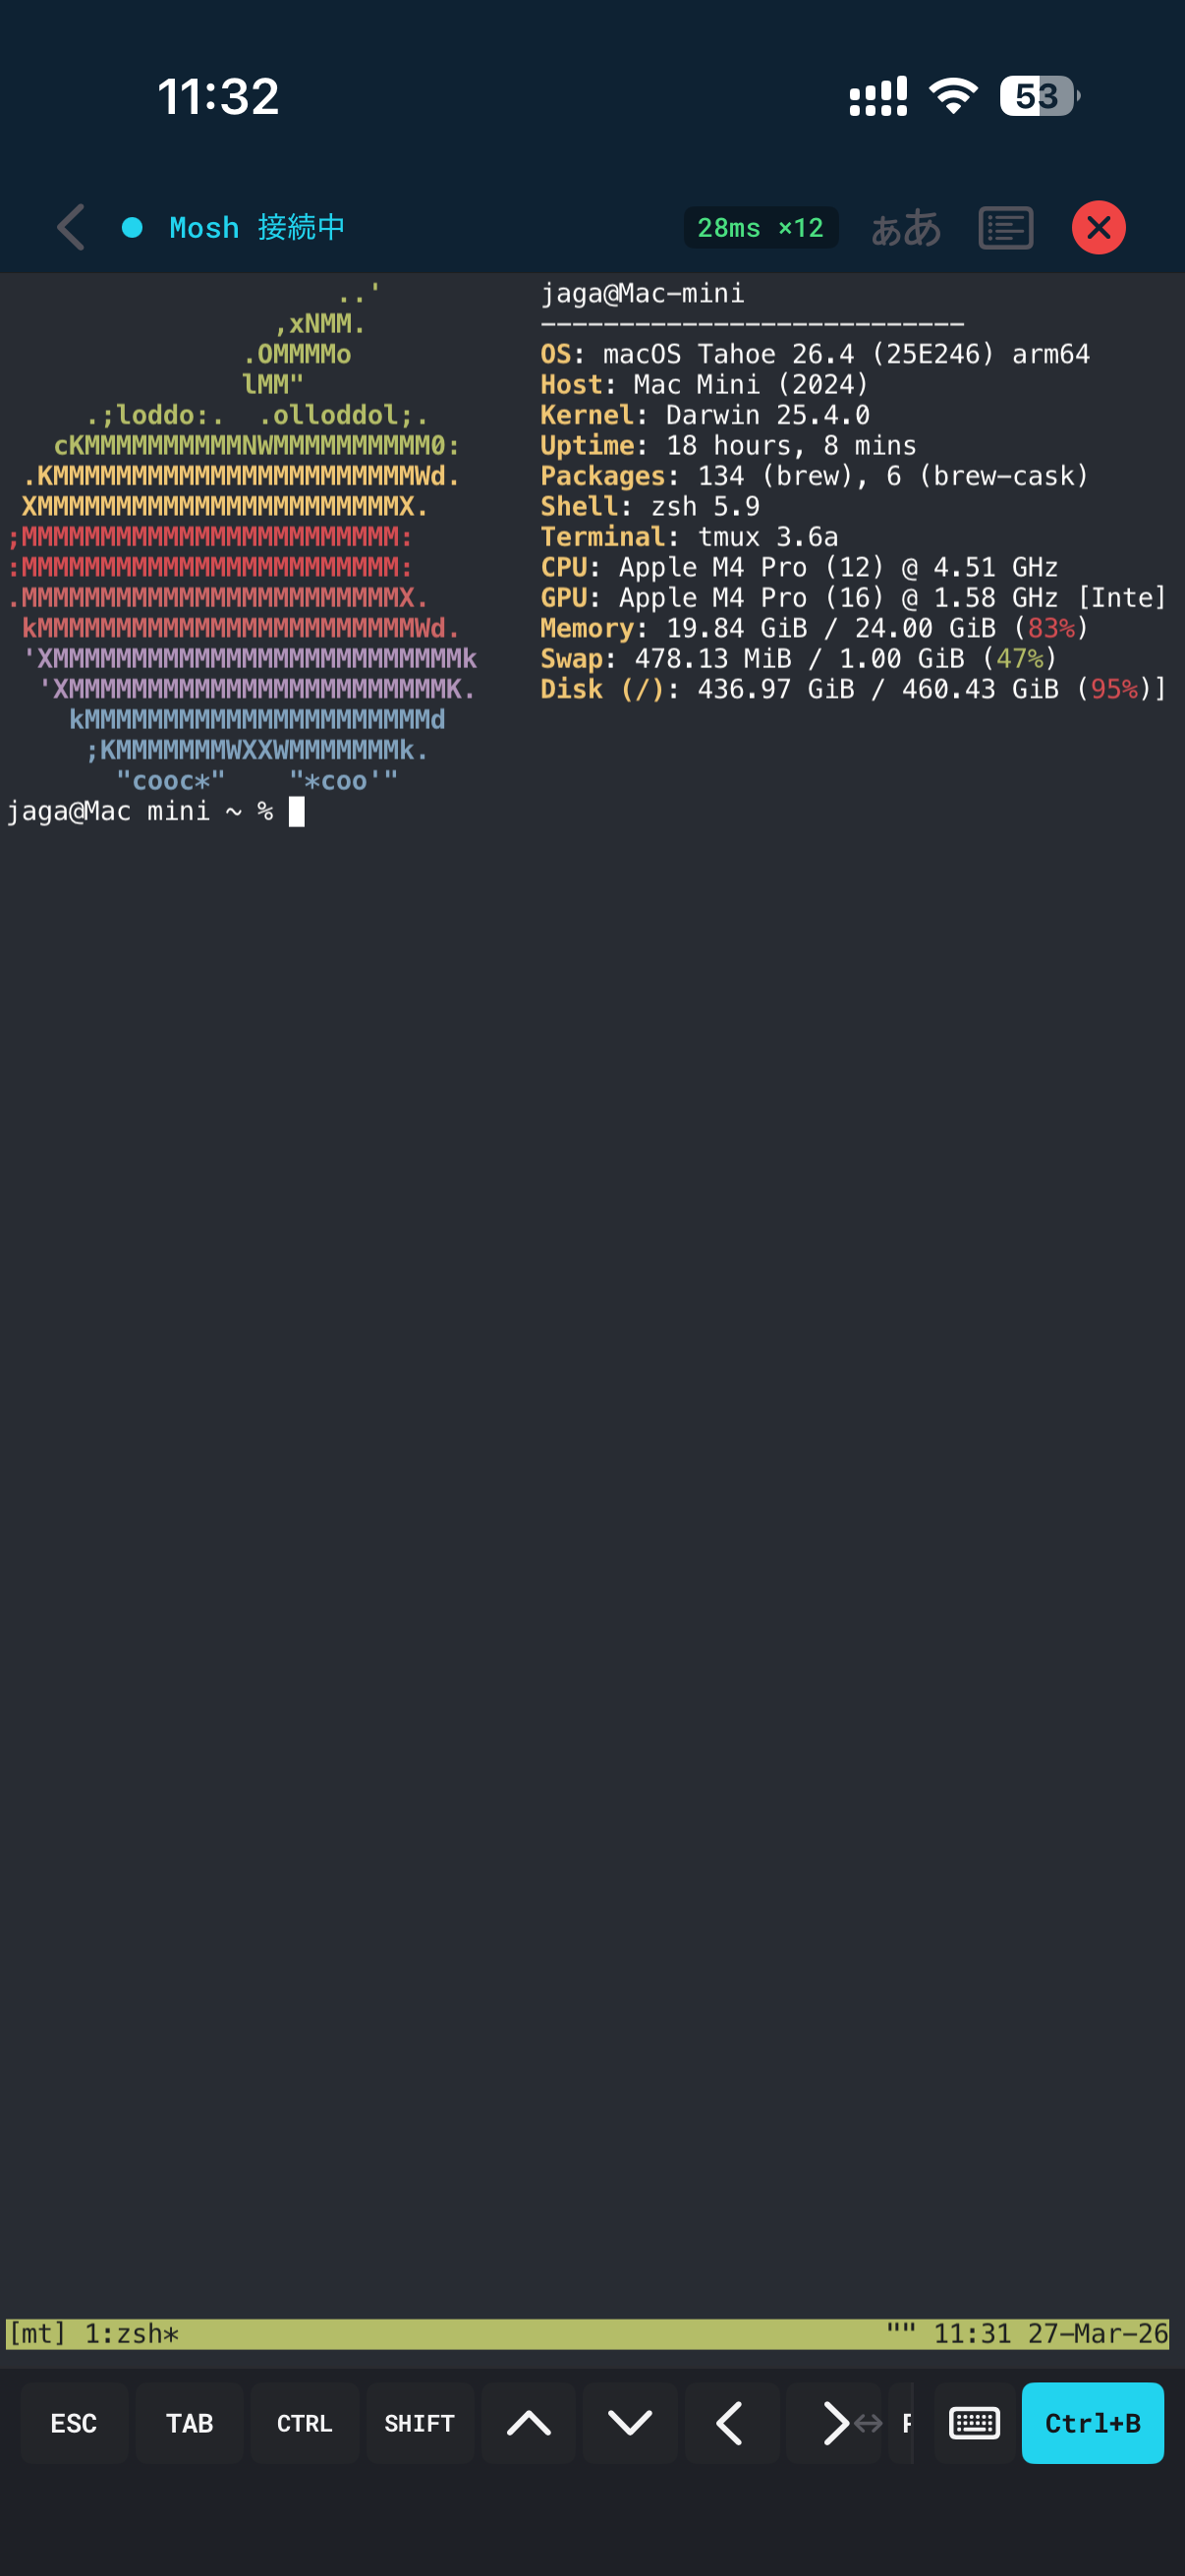
To use Mosh instead of SSH, go to connection settings and toggle "Use Mosh". Mosh is recommended for mobile use — your session stays alive even when switching networks.
Troubleshooting
- Can't connect? Check SSH is enabled and hostname/port are correct.
- Key auth failed? Verify ~/.ssh/authorized_keys permissions (chmod 600).
- Using Tailscale? Run "tailscale status" to verify both devices are connected.
- Windows Defender? Ensure port 22 is allowed in the firewall.
Use tmux
tmux is a powerful tool, but you don't need to memorize any commands. In MT, swipe up from the bottom bar to open the tmux action menu. From there, you can split your screen, switch windows, and manage sessions — all with one tap.

Basic tmux Commands (Reference)
# Start a new session
tmux new -s mysession

# Detach from session (it keeps running)
# Ctrl+B → D (or tap the action bar)

# Reattach to existing session
tmux attach -t mysession

# List sessions
tmux ls
MT lets you do all of this from the bottom bar with one tap. If you accidentally detach, use "tmux attach" to reconnect.
External Keyboard Setup
Connect a Bluetooth or USB keyboard for a desktop-class terminal experience. MT fully supports keyboard-only operation.
Connecting Your Keyboard
- Bluetooth: Go to iOS Settings > Bluetooth, put your keyboard in pairing mode, and select it.
- USB-C: Simply plug in your keyboard via USB-C (iPad) or Lightning adapter (iPhone).
- MT automatically detects the external keyboard and minimizes the software key bar.
Split keyboards (Corne, Lily58, etc.) and custom ZMK/QMK builds are fully supported. If using a multi-profile ZMK keyboard, consider adding &bt BT_DISC to your profile switch macros so iOS properly restores the software keyboard when switching away.
Keyboard Shortcuts
# Terminal shortcuts (same as desktop)
Ctrl+C    — Interrupt current command
Ctrl+Z    — Suspend current process
Ctrl+D    — End of input / logout
Ctrl+L    — Clear screen
Ctrl+R    — Reverse search history

# tmux shortcuts (with default prefix Ctrl+B)
Ctrl+B → %    — Split pane vertically
Ctrl+B → "    — Split pane horizontally
Ctrl+B → o    — Switch to next pane
Ctrl+B → d    — Detach from session

# Special
Shift+Tab     — Reverse tab (unavailable on software keyboard)
View all keyboard shortcuts in the app: Settings > About > Keyboard Shortcuts.
Next Steps
Need help? Visit our Support page.